Last time we left off in Part 1, I had finished building the floor of the shed. This time I will show the framing of the walls.
I framed up the side walls with 2×4’s on the deck of the shed. Once the wall is framed it is squared up and then sheathing is nailed to it while still laying in the floor of the shed. Doing it this way obviously makes it heavier to pick up the wall, but it makes it easier then putting on the sheathing after the wall has already been stood up.
You can see from the picture above how this is done. I used braces going out to stakes versus nailing them to the deck. This holds the walls vertical and allows you to frame the two short walls on the deck and then stand them up without interference.
Once these side walls are up, I frame the back wall and stand it up without sheathing. The reason for this is because the short walls sit inside the long walls and the sheathing laps out to the corner over the long wall. As such you would not be able to add the sheathing while it lays on the deck.
The wall with the shed doors is framed up without sheathing as well. This allows me to run the sheathing up the trusses to give added strength. (For some reason the bottom plate and rim joist look bowed, but it is a camera illusion.) I had planned to do this on the back wall, but I was rushing to get done before a rain storm, and cut them off flush with the top of the wall.
In Part 3, I will show how I frame up the trusses and set them in place. Keep watching and if you have any questions please ask and I will get back to you as soon as I can.
As is always the case on our homestead there is never an idle moment. If it is not working on building and finishing the house, doing driveway improvements, or any of the other homestead chores, I am taking on another building project. This will be a multi part series on building a garden shed. Click these links for Part 1, Part 2.
This project will cover the building of an 8′ x 16′ garden shed. This is something we have needed to do for over a year now. The shed will ultimately be used as a garden shed, but the immediate need is a place to store things while building the house.
That is the hard part of living in the house you are building is that you end up having to work around everything, which makes it take much more time to get anything done since you are constantly moving things out of the way.
I designed this shed to be somewhat portable. It is on 6″x6″ x 16′ pressure treated timbers. There were several reasons for this, but the two most important were ease of moving it if need be, and to hopefully help support the weight a little better then on blocks in our clay soil.
The floor joists used are 2″x6″ x 8′ pressure treated lumber. They span 5′ between the 6″x6″ beams and are laid out 16″ on center and toe nailed and secured by Simpson Seismic / Hurricane Ties. Here is my 5 year old boy and myself nailing the ties.
The next thing to do was to add the sub flooring which consisted of 3/4″ pressure treated plywood. Not shown in the photo are the row blocks that go between the joist.
At end of a half of a days work, we have the completed deck ready for walls.
Keep watching as in the next post I will show the framing and sheathing of the walls.
A few weeks back my dog and good friend of 15 years passed away. It was really hard to see him go, but I am thankful for having him in my life. To me he was not just any old dog, he was also responsible for saving my life on a few occasions when living in the Alaskan Bush. For that I am forever grateful.
One thing that has begun to happen since his death, is that we are seeing a lot more wildlife on our homestead. It started the day after he died. In a way it feels like these animals are showing up to replace his presence and keep us company.
Below is a photo showing two of the four Sandhill Cranes that were hanging out in our field this morning. They are beautiful to watch as they go after frogs in the freshly hayed field. They also have quite the presence as they can stand up to five feet tall.
The photo is taken with my old Canon 30D paired with a Canon EF 300mm f/4L IS USM lens. The shot could have been better if I used a tripod, but I got a new ball head and only have one quick change plate which was on another camera. So that left me hand holding this big lens and using the Image Stabilizer for the shot in fairly low light.
So long pup, and welcome new visitors to our homestead.
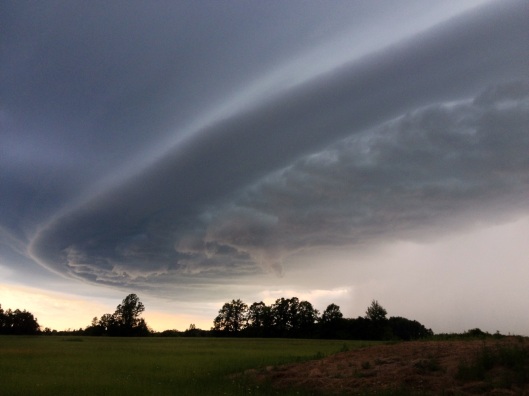
The other day this storm rolled in from the west looking like a space ship doing a low fly by. I just thought it looked cool and wanted to share it with my readers.
Recently I have been researching new and upcoming technology. Living in an off grid house far in the country, we are quite insulated from what is changing in the world around us. That may be a good thing.
The World Economic Forum recently suggested that we are entering the 4th Industrial Revolution. At the beginning of an industrial revolution the technology changes very fast and as a result so does the way we live. The things that are being developed and soon to be common is mind boggling.
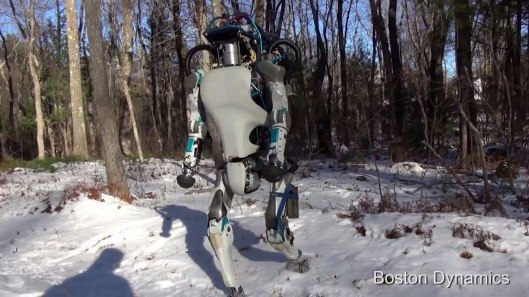
Boston Dynamics New Autonomous Atlas Robot:
This thing is just crazy. The technology leap they have made in the past year is unbelievable. Not only can it walk around and perform tasks on its own, but it has a very advanced balance system unseen before. Pretty cool but also a little freaky.
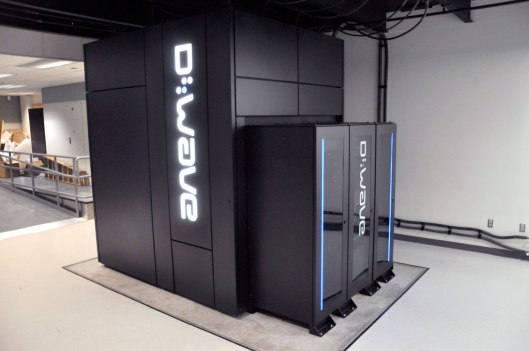
Quantum Computer:
I really don’t even understand how this works, but I am posting it anyways as the quantum computer can change everything. The idea of the quantum computer has been around for some time, but up till recently thought to be impossible. Many of the great scientist and physicist have said once the quantum computer was developed, the technology from it would bring about advances very quickly as it can do computing problems in seconds that would currently take years. It is speculated that this technology will bring about true A.I.(Artificial Intelligence). Combine that with the Robot above would bring us into the Sci-Fi arena.
Entire Buildings made by printing on 3D printers:
This building was printed, not built like we know traditional construction. They have made a giant printer that prints one layer at a time to build a house or apartment like in the photo in a matter of days.
Brain Computer Interface:
Now this one is really bizarre. The tech is already developed but currently being refined. A few people have had a chip implanted in their brains that allow the use of robotic limbs like Luke Skywalker had for his robotic hand. Google also announced a little while back that they are already working on making the software to work with the BCI that would allow you to browse the internet and download information directly to your brain. Say what?
—————
The reason for posting those examples is to make this point.
What has struck me, is how much more important it is going to be that we keep the traditional skills and crafts alive in the future that is coming quicker then most think. The community has grown in the past few years, but as an overall, it is still tiny.
One interview I read recently by the CEO of Google said that we are entering a digital blackout era and that we should print off photos and documents we want to keep. What he was talking about is that the technology is going to change so rapidly in the next five to ten years that much of our data will not be accessible. This is what he has termed a “Digital Blackout”, which he said would lead to much of our current history will be lost since there will be very little hard copies of documents, photos, and videos. Everything is now digital and is easily lost.
This has made me think about how we need to keep the tradition of working with our hands in our crafts alive and store this information in our minds. We have to preserve these skills and share them with others so the are not lost or forgotten. It is nothing new for crafts or skills to be lost in time, but I think we are entering an age where this will be more of a possibility then in the past.
Keep traditional skills and crafts alive by practicing and sharing them with others, especially the youth.
Lets hear your thoughts in the comment section.
P.S. All the things talked about in this blog post are readily available on the net, if you are so inclined to do more research.