
Tags
angle grinder, froe, leaf spring, mallet, metal work, riving, splitting, tools
Lately I have been in need of a froe for some of the woodworking I have been doing. I have looked around for them on the Internet, and while you can still find a few companies selling them, they are not cheap. Being the crafty type of person that I am, I decided that I would just take the time to make my own.
Dimensions:
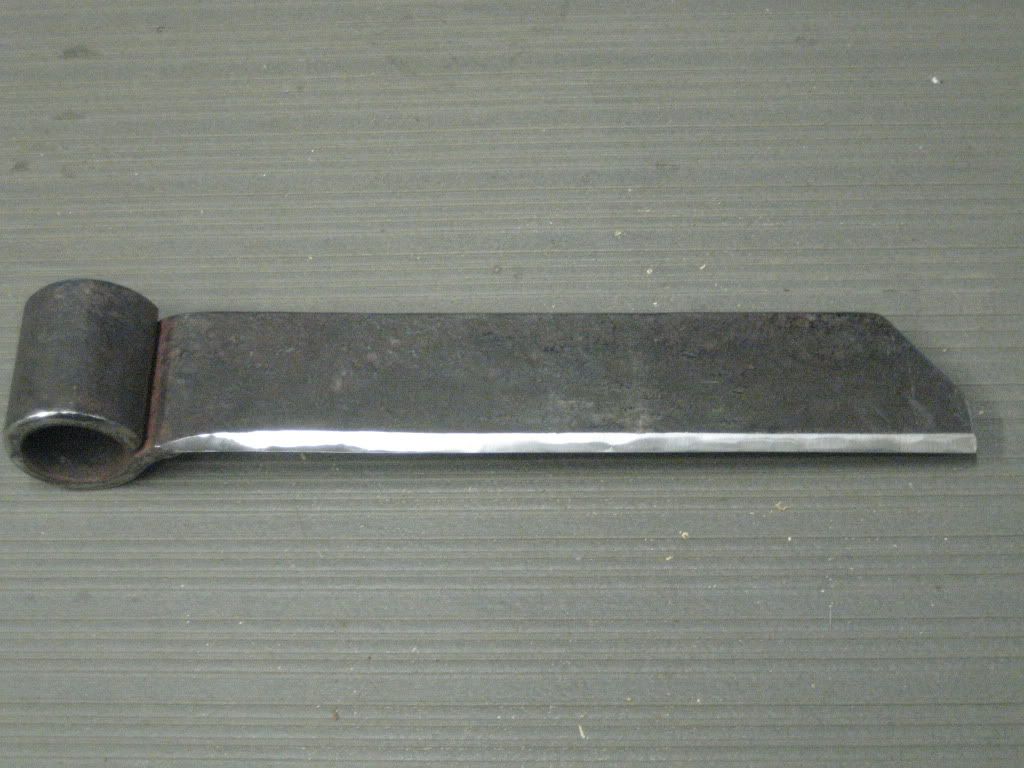
Length: 14.5″
Length of cutting edge: 12.25″
Size of eye: 1.625″
So what is a froe? Well, since you asked, here is the definition from Wikipedia:
“A froe (or frow) is a tool for cleaving wood by splitting it along the grain. It is an L-shaped tool, used by hammering one edge of its blade into the end of a piece of wood in the direction of the grain, then twisting the blade in the wood by rotating the haft (handle). A froe uses the haft as a lever to multiply the force upon the blade, allowing wood to be torn apart with remarkably little force applied to the haft. By twisting one way or the other the direction of the split may be guided.”
So, a froe used in combination with a wooden mallet can split logs into useful things such as planks, wooden shingles, stave’s, or kindling. The thing that I will most often need it for will be to split stave’s from logs. These can then be made into things such as spoons, tool handles, spindles, etc.
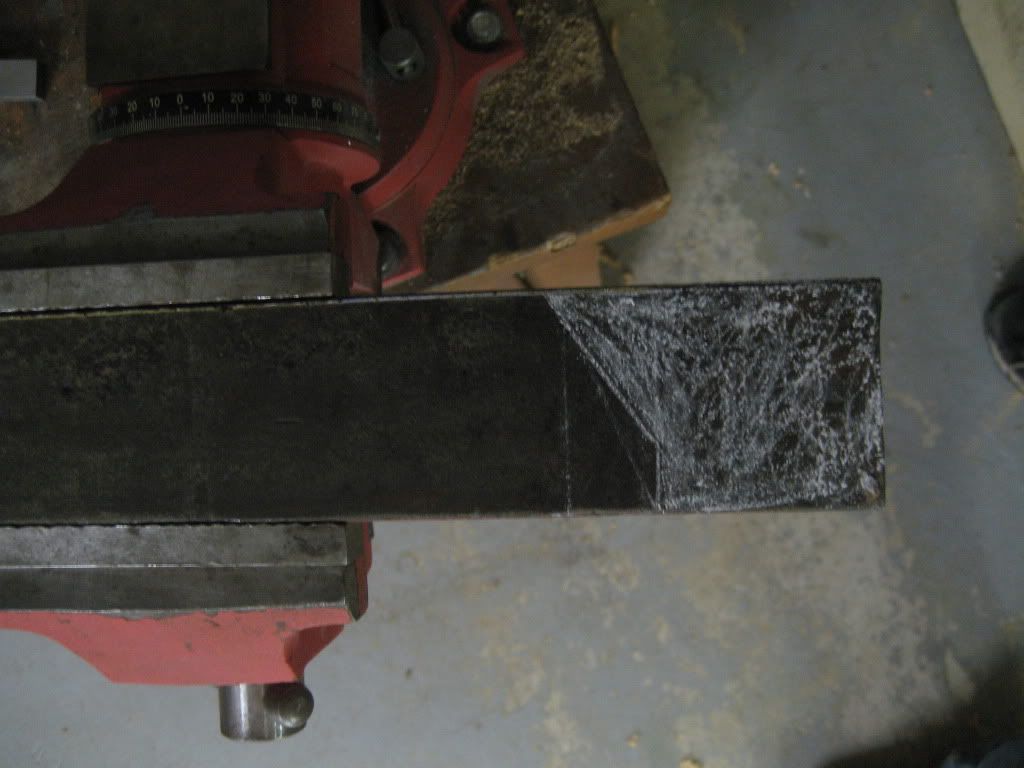
Here is the leaf spring after flattening and before shaping.

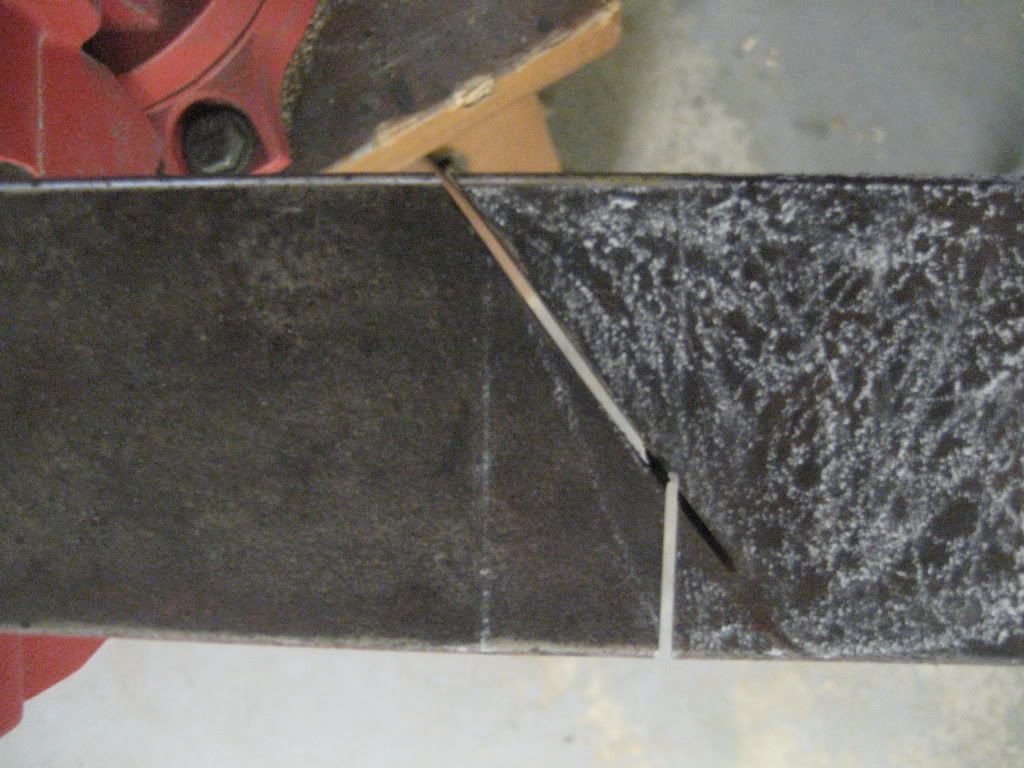
First thing I did was take a flap sanding disk on my angle grinder to clean off the rust. I then laid out the profile that I wanted for the end.
Next I cut the profile with a cut off wheel in the angle grinder.
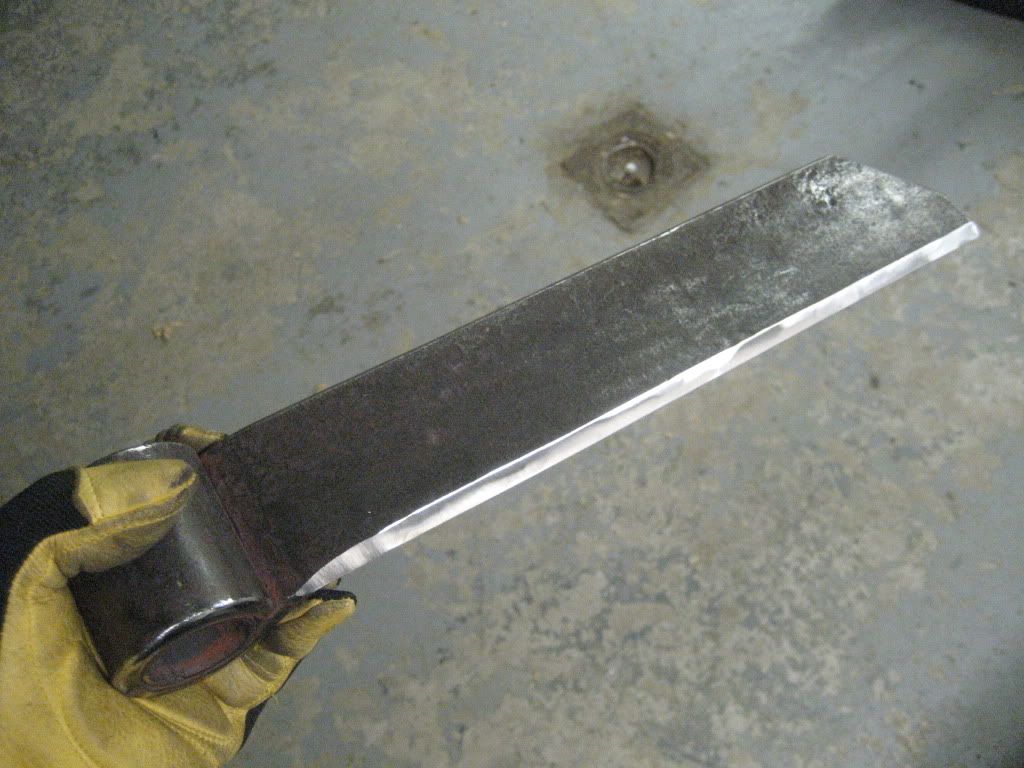
After cutting the blade to the profile I wanted, I put the flap sander back on the grinder and rounded over the edges.
Then I spent a fair bit of time using a grinding wheel on the angle grinder to profile the edge. I was shooting for what I thought might be about 30 degrees as that is the angle Drew Langster suggested in his book, “Green Woodworking”.
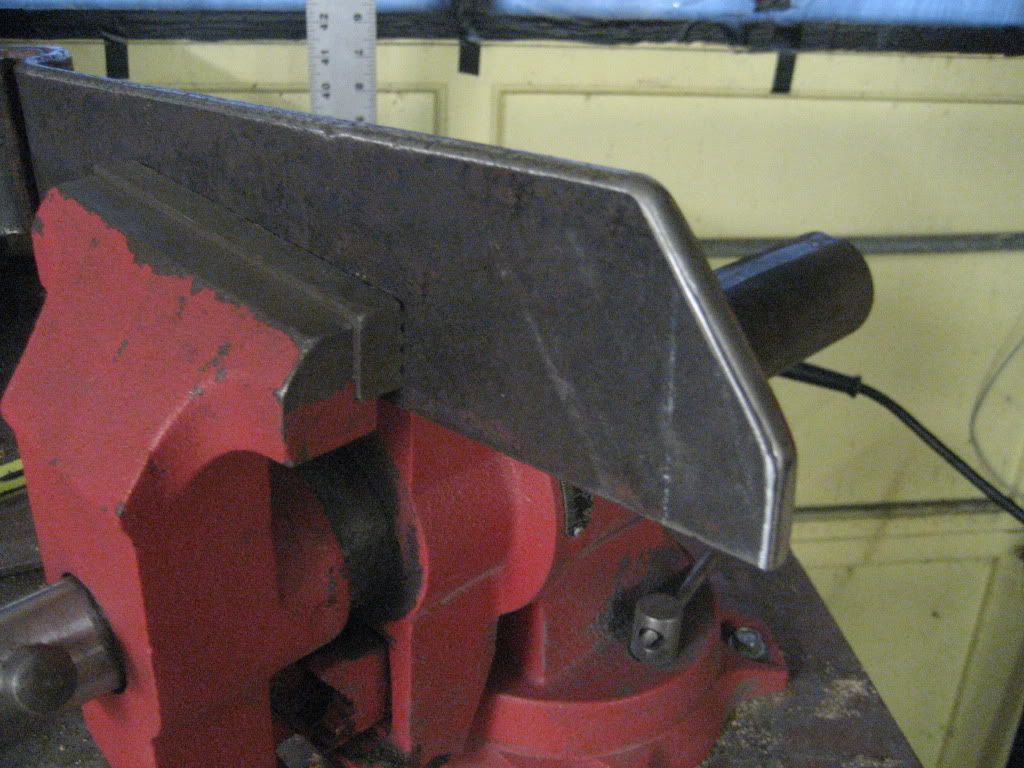
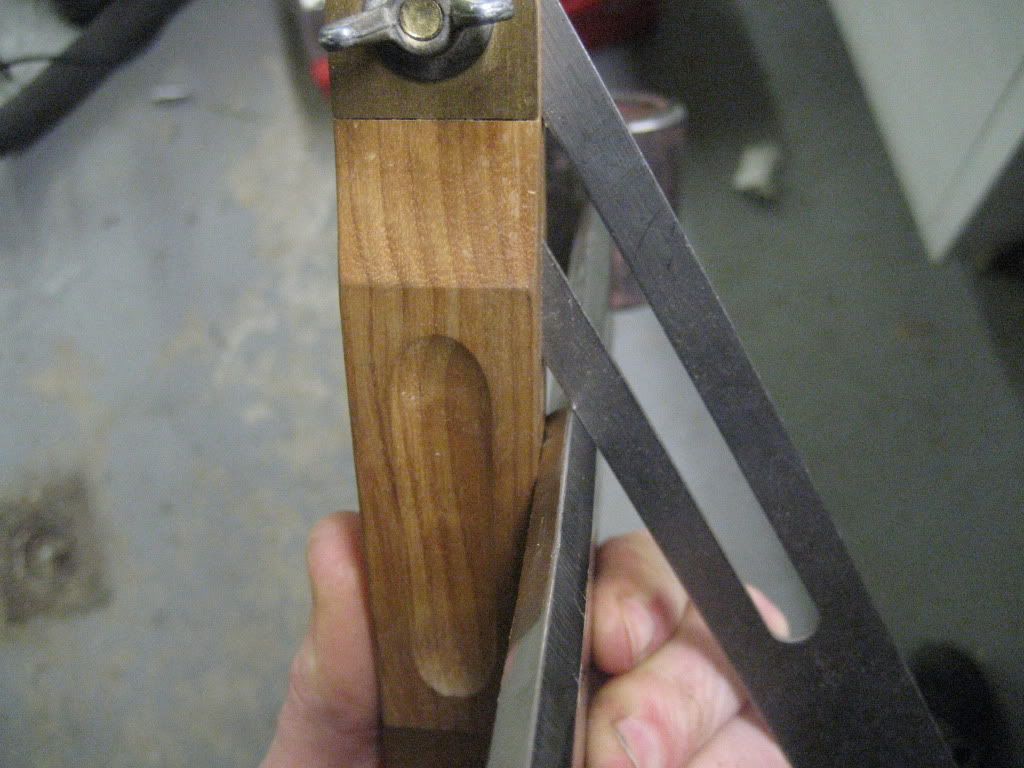
If you look closely you will see that I removed the bushing that was in the eye in the previous picture. I did this so that when I install the handle, the eye will spring out a bit allowing it to grip the handle tightly.
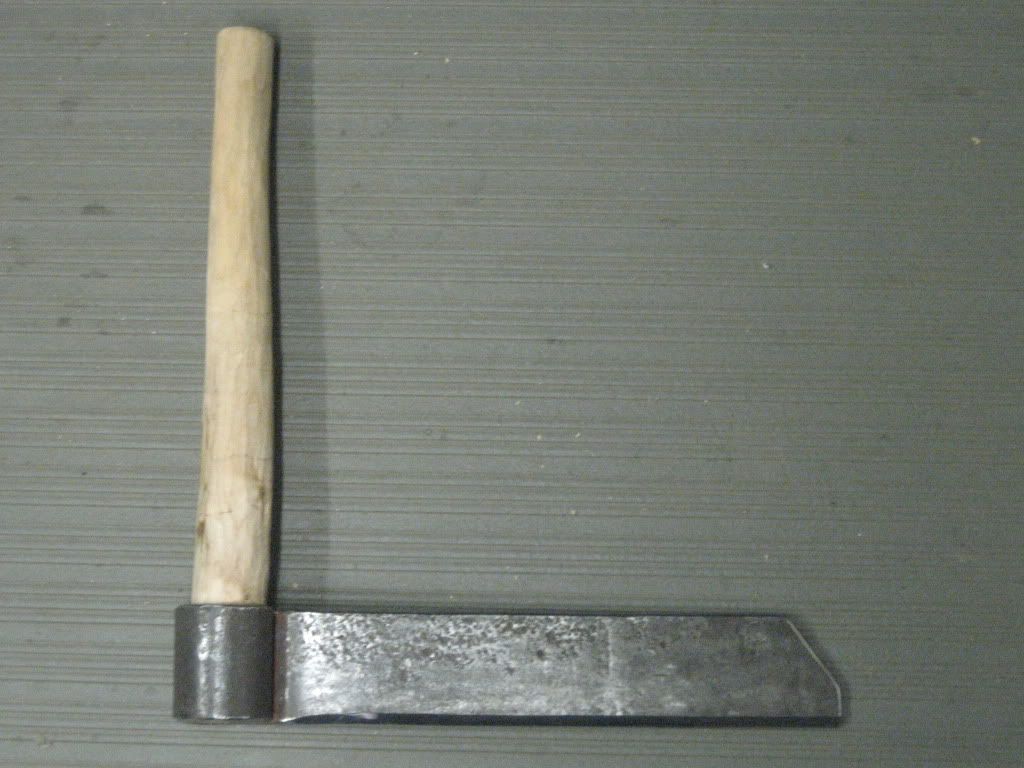
Just for kicks, I put a bevel gauge on it set to 30 degrees, and whammo I was exactly 30 deg. That was some good eyeball work.
All that was left to do was to make a quick handle so that I could start using it. At some point I will make a longer one, but for now this will work.
That is it. Overall it probably took about two hours to do the entire thing. Next I need to make a large mallet for striking it with and away I go.
Thanks for looking, and let me know what you guys think.
Dave
Update 01-2013: I have noticed that a few forums had referenced this blog post and thought I would address some of their questions. Hopefully this will clear some things up. Please feel free to ask me anything else and I will get back to you as soon as possible.
One was that they said leaf springs were not flat and were rounded in an arc shape. This is true and you will need to take the leaf spring and forge it out flat. I did this in a charcoal forge but you probably could do it with a torch.
Next, is that several people said the eye of the leaf spring is too small, however on truck springs such as this they often have large eyes. This one is 1.625″. This is very suitable to building a froe, not to mention that the thickness is 5/16 or .3125″ which is substantial.
Lastly, it was mentioned that it was thought that the eye should have been welded. There are two reasons I did not do this. One was that I did not feel there was a need for it as the steel has proven quite robust. In fact, just for kicks when I was making this froe, I put a large wrecking bar in the eye and tried to bend it out. Even with a 3 foot bar and the leaf spring in the vise, I was unable to permanently bend it. It had a little spring to it which brings me to reason number two for not welding it shut. I did this because I wanted to use this springiness to my advantage. By leaving the eye unwelded, I can drive a handle into the eye that is a bit oversized, and it will spring out just a little and hold the handle very tight. This has proven to be one of the best ways for attaching a handle to a froe so far that I have used. I have yet to have the handle loose up on me even when using a lot of force on large logs.
Well I hope that explains some things that I did not talk about in the blog post. Again please feel free to ask any questions.

I have no idea what you are talking about but I like the end product that you did. You are one talented boy. 🙂
Charlene
Haha. 😉 I added a definition and what I plan on using it for to give you a better idea. I often forget that not everyone knows what these tools are. Thanks for the comment. — Dave
Wow, that’s perfect! It even has a pre-formed eye!
Thanks. Yeah the leaf spring is a great material to use as most of the work had already been done. Saves a lot of time and the spring stock is tough to boot.
Thanks, Dave
Hi Dave. I have a broken leaf spring that I am planning on turning into a froe. How did you take the bend out of the spring to get it straight?
Thanks,
Jeff
You will need to heat it up and hammer it flat. If you do no have a forge you can just throw it into a wood stove or fire pit and pull it out when it is at an orange heat and hammer it flat. You could also just leave it in there till the fire dies down and cools off. This would anneal it and make it soft enough that you might be able to hammer it flat when it is cold. That would be a lot more work though as leaf springs are quite tough. Good luck.
Hey Dave,
First time commentor and big fan. It has been almost a year since making your froe: How is it holding up? I am looking to follow your footsteps in making one out of a leaf spring. Money is tight, so I can never justify any purchases, even small ones, for metal unless it is worth while. Thank you Sir!
It has been serving me well this past year. Still using the same handle too. The only modification that I plan to do this winter when I have time is to grind the bevel back a bit more. The bevel that I put on it seems common among froes, but makes it difficult to get started in hard wood. A steeper ground angle would help to get it going easier.
Thanks for your comment and I appreciate your interest in my blog.
Dave
In reading the above post you are correct – When you use your froe you’ll have better control if the taper of the blade is wedged shaped. Meaning the taper should start at the sharp edge (not really sharp – lol) and go all the way to the back. That’s a lot of grinding but you’ll have a froe that will work much better.
Yep it is on my list of to do items. I could fire up the forge and hammer it out but I do not have the time for it right now, not to mention the blacksmith shop is covered but not enclosed and it has been cold and snowy. One of these days.
Dave
I need a small froe and I like your plan. Thanks for the detailed photos. I’m a bit puzzled why you sharpened both sides. Most froes are sharpened only on one face so you can control the direction it splits by pushing or pulling on the handle as you drive it thorough with a mallet. What’s been your experience?
The only really reason I beveled both sides is because that is how I have always seen it done. Maybe it is a regional thing, I don’t know. Beveling only one side would definitely be easier to do.
Dave
Great tutorial! I’m about to embark on making a froe myself, and I was wondering if you could elaborate on the process of flattening the leaf spring with a torch / forge. How did you cool the metal once you had it hot enough to flatten? Did you just let it air cool? Or do some sort of quench and then temper in the oven?
Nice article, thanks for the info, will have a search around the workshop for suitable bits to have a go myself 🙂
Thanks for taking the time to inform other interested people like me!
I want to cut large beams for my home and was reluctant to purchase a froe, thinking I can make one.
Thanks, very informative. I finished one about a week and half ago. Had very difficult time with the 30 degree edge starting its initial bite into the wood. Finally decided to make the angle considerably more acute. Works well now.
What is your recommendation for finish. I do not have a forge but use a coal stove.
I’m wondering if a severe temper i.e heat the whole blade to orange then quench in hot water would be advisable. It is presently annealed more or less as a result of heating to orange hammering out and letting it air cool. I’m not sure if it should be tempered or not? Thanks