
This past fall I collected a handful of walnuts to make a batch of walnut stain. There isn’t a lot of information on making your own stains, but I remember reading about walnut stain in an old book when I was a teenager. I picked the walnuts off the tree before they fell to the ground in the fall. At this stage they are still green but it keeps them from getting full of maggots as they do when you get them off the ground.
One method for making walnut stain is to boil the husks in water for around eight hours and then decant off the liquid. I decided against this as I wanted it to be more concentrated so that I can add alcohol to it and make it into an alcohol based stain. This should reduce the amount of grain being raised on the wood and give deeper penetration.
The method I use, is to take the walnuts with the husk on and merely let them sit for 6 months in a large glass jar out in the shop. After a few weeks they start turning a dark color. After a few months they get a little moldy and start releasing their juice, which is what can be used as the stain. Below is a picture of the large jar used for aging and fermenting the walnuts.
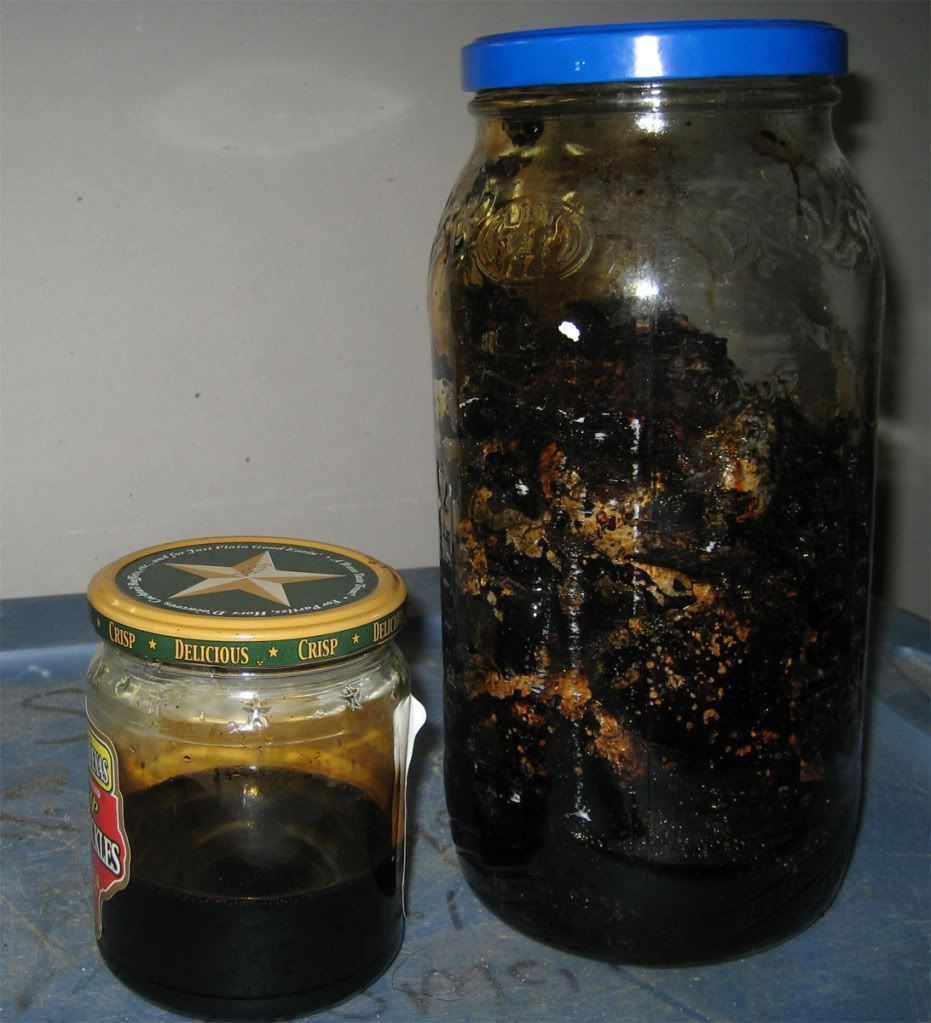
Once the walnut juice has stopped seeping out, you can pour off the liquid and use it for stain. At this point I have not added alcohol, but plan to. This should help preserve the stain and keep it from molding.
Here is a picture of three handles for some tomahawks that I make. The top one is before sanding and staining, the middle is stained and lightly carded with fine steel wool, and the bottom one has been stained and given a coat of BLO (boiled linseed oil).
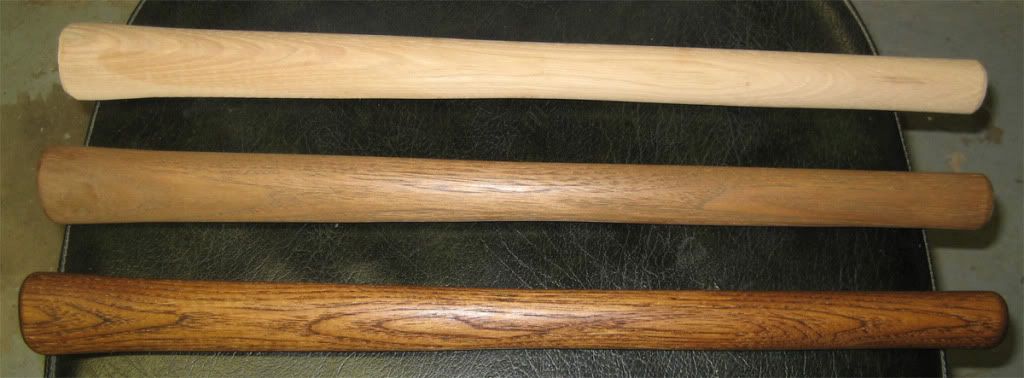
As you can see, this homemade walnut stain produces a very nice deep brown color. I like using it for the handles on my tomahawks because it gives a nice aged look to them. It also goes well with the browning finish that I put on the tomahawk heads.
As always I hope you enjoyed this write up, and if you have questions or comments I would love to hear from you.
Thanks,
Dave

Hi Dave,
Is the lid on the jar tightly when they are fermenting?
Tico
Good question. I actually left it on somewhat loose. I don’t know if it mattered, but I thought that it might build up pressure and break the jar. Probably it would have been fine though if it had been tightened down.
Thanks,
Dave
That done a really nice job on the handle. It produces a rich color with depth. Something else I’ve gotta try. Thanks for the post! One question – does the stain have that great walnut odor?
You know I am not sure if it does have a walnut odor. Probably it does but my nose is pretty messed up and I cannot smell very well. I could ask my wife and see what she thinks.
Hi Dave, I’m an amateur woodworker and enjoy making things out of salvaged material and stumbled on your site – I never considered blacksmithing – but I love that you made a tool out of a leaf spring! I might have to get into working with metal someday.
Very interesting article about making your own stain! I never knew there was such a thing as walnut stain – I thought it was just a color shade that you buy at the store!
I’m curious about a couple things – would it have affected the outcome of the stain if you had picked up the walnuts from the ground and they were filled with maggots?
Also, how much and what type of alcohol would you use when turning it into an alcohol stain?
Sorry for such a slow response. Usually I try to respond in a few days but your comment slipped under the radar.
I picked my walnuts off of the tree, but a lot of people get them off of the ground. I don’t think the maggots really affect things much. Most people will pick them out. For me I would rather just get them when they are still on the tree and not mess with it.
I really don’t know what the best ratio of alcohol would be. I tried a batch with some alcohol and it did strange things to it. So far I have not had problems with the stain as is and without alcohol. I am considering trying some sodium metabisulfite to preserve it a little better. This is something that is used in wine making to preserve the wine so it seems like it would work for this application.
Take care,
Dave
So If you don’t add alcohol, do you need to keep the stain refrigerated? Seems like it is just walnut juice and would ferment.
I have one bottle from over a year ago that is still fine. It is a little musty smelling but nothing bad. Once it is on it is fine. No mold or anything yet either.
does anyone know anything about canning the stain: boiled in sealing jars?
I don’t see why you couldn’t can it. That should make it last longer. I might have to try that the next time I make a batch.
I have a few thoughts here, I’ve always heard walnut husks are toxic so I don’t think you’d need a preservative and canning it would probably be just the thing. My husband has been working on a carving using a piece of black walnut. I was sweeping up and put the brown shavings in a bag – I plan to try boiling them to see if I can make a stain from the shavings. Do you know if that would work or if using the bark would also make a stain?
I think that you would need to use the husk and not the bark. However I have not tried making walnut stain with the bark so you could give it a try and let me know how it works. I need to hunt down some more walnuts as I have since moved up north where they do not grow.
I’ve had a rough year healthwise but all is good now, I tried using the shavings and bark with no success – just looked like dirty water. We gathered some green walnuts and used the husks and made plenty of stain that has kept very well. Just wanted to follow up about the bark and shavings.
Dave I might could help ya out with black walnuts.how many do you need? I say might …I haven’t been out to look at my trees yet. just let me know
Hey Randy. I just got this today. Thanks for your offer of the black walnuts. If they are still good I would really appreciate any you could spare. The last batch of dye I made, I think I must have had maybe 20-30. I would be happy to send you a check to cover shipping. Send me a message through the Contact Me page and leave your contact info and I will get ahold of you.
Thanks
Dave
Exactly how much alcohol do you use? What would the ratio be ?
yes how much alcohol do you need.mew to this. Linda
Thanks for the comment. I really need to revise my article as adding alcohol to the stain was not very successful. Use it without the alcohol and it will work out great.
Very insightful. I plan to use it as a stain on Primitive clothing/craft projects.
Hi thanks for an informative post, I have used walnut husk stain to finish an antique chair however the stain keeps coming off when something spills on it, I have tried bees wax to finish it but the stain still lifts, can you advise best way to get a finish. That will resist some water I would like to stay with traditional finishes were possible Thank you.
You might try using tung oil (also known as china nut oil). It is a fairly water-resistant drying oil, similar to flaxseed (linseed) oil. I use a 1:1 ratio of pure tung oil, and citrus solvent on spoons I make. The citrus solvent thins it, and helps it penetrate into the wood better. It’s nontoxic. Flaxseed oil might work too, but tung oil is better.
What kind of alcohol and how much do you add to the walnut liquid?
I did not have much luck with adding alcohol to it. It is better if just left as is. I need to change the article to reflect that. Thanks for the reminder. 🙂